
")

If you’d told me a month ago I’d be casually making my own bread, I would’ve laughed, made a sarcastic comment, and gone back to my craft chaos. Yet here I am — elbow-deep in flour, somehow raising a sourdough starter like it’s a third child, and baking actual loaves like I’ve secretly been preparing for a cottagecore lifestyle my whole life.
And honestly? I’m kind of loving it.
After a week of battling gloopy dough, flour clouds, strange smells, and a whisk that absolutely lied to me about being “life-changing”… I finally produced a proper, soft, golden sandwich loaf. From scratch. In my own oven. With no disasters. No tears. No smoke alarms. A Christmas miracle.
⭐ A Wee Bread Experiment (Because of Course I Tested It Twice)
Because I’m me, I couldn’t just make the loaf once and call it a day.
No no — I had to test it properly:
Loaf One: kneaded by hand
Loaf Two: made using the dough hook on my stand mixer
And I’ll be honest…
the mixer absolutely won. 😂
The hand-kneaded loaf was lovely, but the mixer version?
- better rise
- softer crumb
- smoother dough
- much less swearing
If you have a mixer with a dough hook, USE IT. Save your wrists for knitting.

⭐ Then I Tweaked the Recipe (Because Why Not)
The original recipe was great, but after making it twice, I made a few adjustments that made it even better:
✨ Turned the heat down slightly
(My oven runs hot, so instead of 180°C fan, I nudged it a bit lower.)
✨ Baked it a little longer
Just until the top turned a rich golden colour.
✨ Brushed the top with milk
Gives it a soft, shiny crust.
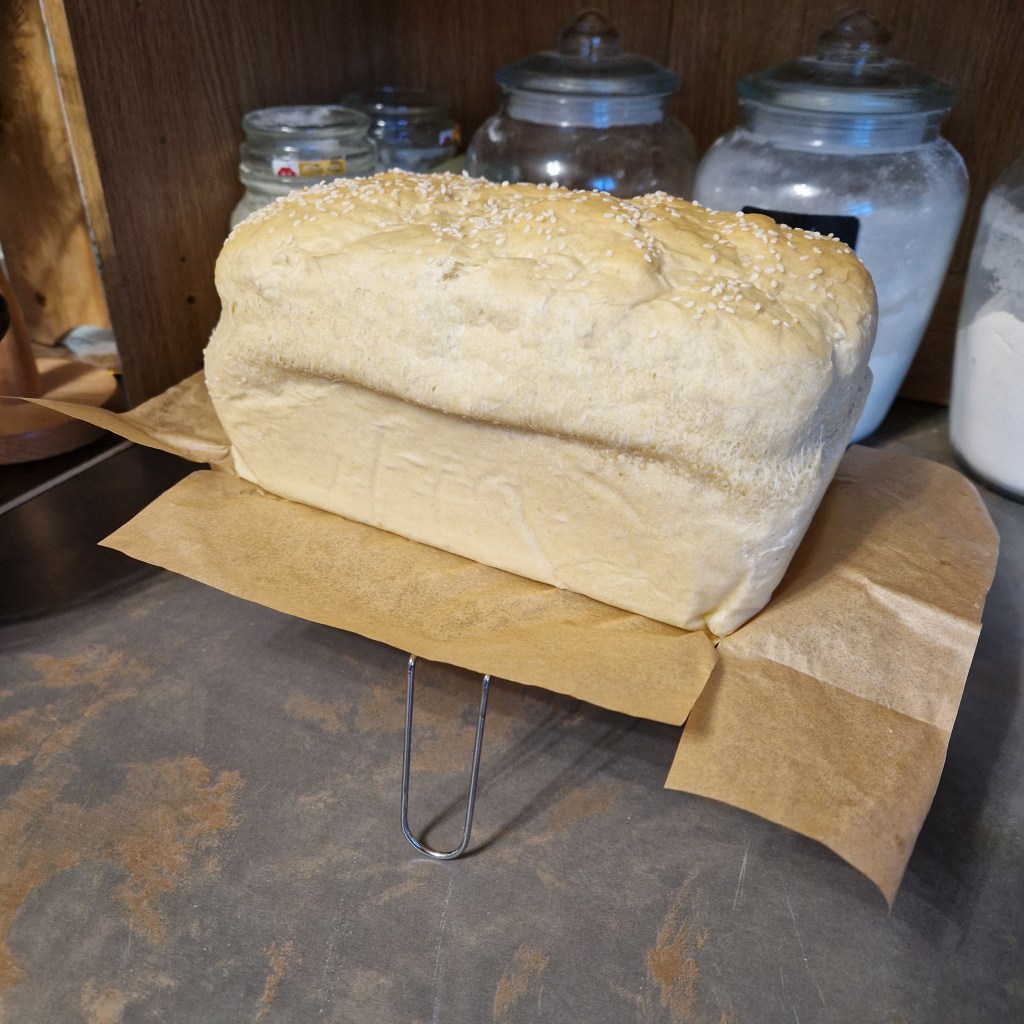
✨ Sprinkled sesame seeds
I don’t know why, but this made me feel like a Real Baker™
Also… it looks fancy.
So here you go –
🍞 My Soft Sandwich Loaf Recipe (Beginner Friendly!)
(Based on my original printout, with my chaos-tested tweaks)
The PDF, if you want it, is at the very bottom.
Ingredients
- 400g strong white bread flour
- 8g salt
- 20g sugar
- 20g softened butter or 2 tbls oil. (I used avocado oil)
- 1 packet yeast (7g fast action)
- 280ml warm water
- Optional: milk for brushing + sesame seeds for topping
1. Activate the yeast
In a jug, mix warm water + sugar + yeast.
Leave it 5–10 minutes until it turns frothy and looks alive (the fun part).
2. Make the dough
Pour the foamy mixture into a bowl. Add flour, salt, oil.
You can:
• Mix and knead by hand (8–10 mins)
or
• Use a mixer with dough hook (5–6 mins — my better result!)
You want a soft, slightly tacky dough.
3. First rise
Place in an oiled bowl, cover, and let rise 1 hour until doubled.
4. Shape the loaf
Punch down the dough, roll it into a tight log, and pop it into your loaf tin.
5. Second rise
Let it rise again until the dough reaches the top of the tin. I left this 45 minutes.
6. Milk wash + seeds
Brush lightly with milk.
Sprinkle sesame seeds if you’re feeling fancy (I was).
7. Bake
The recipe calls for 180°C for 25–30 minutes.
BUT — in my oven, I turned the heat down slightly and baked it a bit longer, until the top turned perfectly golden. I think it was 45 minutes for that.
Every oven has its personality… mine likes to be dramatic.
⭐ My Tweaks for a Better Loaf
- Lower the oven temperature slightly from 180°C fan
- Bake a little longer (around 40–45 mins) until the top is golden
- Brush with milk before baking
- Sprinkle sesame seeds
You’ll get a soft, shiny, bakery-style finish.
⭐ Final Thoughts
This bread is soft, forgiving, smells like a warm hug, and makes you feel like you’ve unlocked a new domestic skill achievement. Truly, if I can make this without summoning the baking demons, anyone can.
If you try it, tag me — I love seeing your attempts, successful or chaotic.
💛 A Wee Reminder
If you enjoy these cosy recipes, craft ramblings, and behind-the-scenes glimpses, I share even more over on Patreon — including:
- free monthly knitting patterns
- studio updates
- behind-the-scenes chaos
- early previews of new designs
- and the general unfiltered LT energy
👉 https://www.patreon.com/LTMarshall
You’re always welcome there. 💛✨
Discover more from
Subscribe to get the latest posts sent to your email.
